Soil solarization is one of the simplest ways to kill weeds, pests, and pathogens in your garden bed without chemicals. All you need is clear plastic, sunlight, and a few weeks of patience.
Below is a step-by-step walkthrough covering what you need and what to watch for at each stage.
What is Solarization?
Solarization is a non-chemical technique used by farmers and gardeners for centuries. It controls soil-borne pests, bacteria, fungi, and nematodes using natural solar radiation.
Farmers often face crop destruction from unwanted pathogens and weeds. These problems can reduce yields significantly, and sometimes production becomes almost zero.
Soil solarization offers an eco-friendly solution. By trapping heat under clear plastic, it raises soil temperatures high enough to kill harmful organisms without any chemical residue.
What Are the Benefits of Soil Solarization?
A Brief History
In ancient times, before advanced pesticides or insecticides existed, farmers used this non-chemical technique to raise soil temperatures and kill pathogens. The technique was first reported in 1888 in Germany and formally adopted in the United States in 1897.
How It Compares to Other Methods
Soil solarization sits alongside soil fumigation and soil steaming as a common approach to soil improvement. Unlike the other two, solarization leaves no chemical residue, making it a strong fit for home gardeners and farmers.
It works by raising soil temperatures to a target level for a set time frame, killing weeds, insects, and pests. Solarization also increases the presence of beneficial soil organisms that combat problems in future growing seasons.
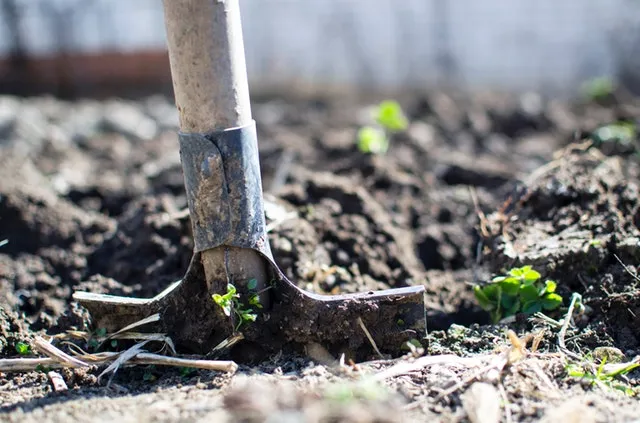
Preparing the Soil
The soil must be kept covered, since the thermal treatment requires moist conditions. Solarization is effective in all types of gardens, from flower beds to vegetable plots to raised beds.
Adding organic materials like composts and crop residues before solarization makes the soil healthier and more productive. The process involves covering the ground with polyethylene so the sun heats it to peak temperature, preparing the bed for the next planting season.
What is the Difference Between Artificial Heating and Soil Solarization?
People sometimes confuse artificial heating and solarization because both involve raising soil temperature. The key difference is the heat source.
In solarization, heat transfers directly to the soil from sunlight through clear plastic, with no external energy source required. Artificial heating uses an external source to deliver heat, typically reaching 70-100 degrees Celsius.
Natural solarization provides milder, more gradual warming. It still requires proper methods and guidelines for effective pest and pathogen removal, which are covered in the steps below.
What is the Importance of Solarization?
Solarization is an essential method for farmers, gardeners, and crop producers. Controlling the growth of weed seeds, pests, and pathogens like parasitic nematodes and fungi has become a real challenge.
These organisms grow inside the soil, damaging crop production and food quality. Pesticides and other soil fumigants are not always effective, as they leave many pathogens intact.
Solarization makes it easier for farmers to protect their soil and crops from these harmful organisms.
Key benefits of the process include:
- It raises soil temperature to a level that destroys disease-causing organisms, weed seeds, pests, and insects.
- It improves soil health by advancing nitrogen content and nutrients to growing crops.
- It speeds up the breakdown of soil organic materials and releases nutrients like nitrogen, magnesium, calcium, fulvic acid, and potassium.
- It allows plants to grow faster with better quality yields.
- It helps build beneficial microorganisms in higher proportions.
- It creates pure soil for the next crop planting.
What Are the Advantages of Soil Solarization?
Soil solarization is beneficial in both ecological and practical terms.
The Two Main Advantages
- The solarization process has minimal side effects on the abiotic and biotic components of the soil, making it more effective than many alternatives.
- It is affordable and accessible worldwide, costing far less than chemical or artificial soil disinfestation methods.
Other Advantages
- It destroys or controls unwanted fungal and bacterial plant pathogens that cause Fusarium Wilt, Phytophthora root rot, Southern Blight, Verticillium wilt, Damping-off, Tomato Canker, and many others.
- Solarization also reduces several species of nematodes that can recolonize the soil by moving deeper to escape the heat.
- It controls weed seed production in the soil with its high solar radiation.
- The solarized soil produces better quality food with fewer pest problems.
- It also increases food availability as the soil can produce fruits and vegetables in greater quantity.
Once you understand the benefits, you should also be aware of its limitations.
What Are the Limitations of Solarization?
Like other processes, soil solarization has some limitations.
- It depends on climatic conditions, since solar radiation is the main energy source for destroying organisms.
- The clear plastic used during solarization can leave residue, contributing to pollution if not disposed of properly.
- The soil must remain clean and crop-free for several days or weeks during the treatment period.
Principles of Solarizing a Garden Bed
There are some principles to remember to maximize the benefits of solarization.
- The solarization process heats the soil with a recurring daily cycle.
- Heat efficiency decreases with increasing soil depth.
- The best time for the process is when conditions are favorable, which can be determined by measuring soil temperature or by tarping.
- Proper soil moisture is necessary to increase thermal sensitivity of organisms, improve heat conduction, and enhance biological activity during the process.
- Moisten the soil by irrigating once before applying the clear plastic.
- Additional irrigation should be avoided, as it may interrupt the process.
- Prepare the soil before solarization so it does not need to be disturbed afterward.
- Use thin, clear polyethylene to cover the soil.
- The process causes physical, chemical, organic, and biological changes in the soil that eliminate pests and enhance plant growth.
What is the Solarization Process?
The best time to solarize is when solar radiation and temperature are at their highest. This occurs during long, clear days with minimal wind and high air temperature.
Before you begin, keep these points in mind:
- The soil should be leveled and free of debris.
- Moist soil is best for raising temperatures, but it should not be saturated.
- Dig a trench before applying the plastic.
- Leave the plastic in place for about four to six weeks for proper heat retention.
1. Preparation of Soil
The first step is cleaning the soil surface. A smooth, clean bed lets the clear plastic sheet sit flat without creating air pockets.
Air pockets reduce heat absorption and can cause the plastic to blow away in the wind. Flat areas absorb the most heat, though raised or leveled beds also work well and help prevent recolonization by weed seeds.
Orient beds from North to South rather than East to West for more consistent heating. The best results come from areas with minimal slope.
2. Irrigation of Soil
Irrigate the soil to a depth of at least 12 inches. It is easier to irrigate before covering the bed with plastic.
You may also irrigate with a soaker hose after covering the soil bed with clear plastic. Place the plastic immediately after watering to reduce evaporation and maintain moisture throughout the solarization process.
Avoid irrigating once the process has started, as it may interrupt heating and prevent the soil from absorbing enough energy. Make sure the soil’s moisture level is high before you begin.
3. Choosing a Plastic Tarp
Always use a clear, transparent plastic sheet so sunlight passes through and the soil can trap the heat. Black plastic absorbs heat at the surface, so less warmth reaches deep into the soil.
However, black or opaque sheets are preferred for coastal regions.
Choose a thin plastic with an approximate thickness of 0.001 inches. In high-wind areas, use slightly thicker plastic at 0.0015 inches, and for small treated areas, prefer 0.004 inches.
Many plastics designed for solarization resist tearing from wind, animals, or sunlight.
Select a clear, transparent film, not cloudy, milky, or translucent material, which would reflect heat radiation. Check that the sheets can be removed easily at the time of disposal.
If the plastic tears during the process, patch the holes with durable tape.
For home gardens, you can use a double plastic layer with an air space created by a plastic bottle or PVC pipe to boost soil temperature. If you are also setting up solar-powered garden lights around your beds, solarization is a good time to plan the layout.
4. Place the Plastic Over the Garden Bed
On flatbeds, place the plastic tightly over the area by digging a trench of about 4-6 inches. Put one edge in the trench and cover it with soil to hold the plastic in place.
Pull the other side tightly and bury it in the trench on that side. Repeat for all edges.
Pack the plastic as close to the soil surface as possible for maximum heat absorption. Avoid covering multiple beds with a single sheet, since this reduces heat absorption and makes the plastic vulnerable to high winds.
Use one sheet per bed so heat is concentrated where it is needed, not wasted on the channels between beds. Choose a tarp with enough extra surface area to cover the entire bed plus the trenches.
Keep treated beds separated from untreated soil to prevent recontamination.
5. What Happens During the Soil Solarization Process?
The soil needs both time and adequate temperature for effective results. If the soil temperature is not increasing, leave the plastic in place until conditions improve.
Aim for a temperature of 110 to 125 degrees Fahrenheit in the top 6-8 inches of soil. Use temperature probes or soil thermometers to verify daily readings.
Four to six weeks of heat absorption during warm days is usually sufficient to control pests and both annual and perennial weeds. On cloudy or winter days, leave the plastic on for about 8-10 weeks.
On the hottest days, pests can be destroyed in less than six weeks. Do not disturb the plastic during the process.
6. After Solarization
After the process is complete, remove the plastic carefully without displacing the soil. You can also leave the plastic in place as a mulch and plant directly through it.
Painting the plastic white or silver after solarization can help repel pests and insects during the growing season. The tarp will eventually degrade over time.
If you cultivate the soil before planting seeds, keep it shallow, about 2 inches deep, to avoid bringing untreated weed seeds back to the surface. You should see a reduction in weeds, pests, and soil pathogens for about four to five months, long enough for a full fall garden.
Keep in mind that soil-borne pathogens can eventually recolonize the solarized soil, so continue to monitor and care for the bed over time. If you are thinking about other solar upgrades around the house, take a look at whether rooftop solar panels are worth it or explore the best solar ovens for outdoor cooking.
Frequently Asked Questions
Can I solarize my garden bed in the winter?
Solarization works best during the hottest months of the year, when the sun is at its strongest. In winter or cloudy climates, the process takes much longer and may not reach the temperatures needed to kill deeper pathogens.
If winter is your only option, plan for 8-10 weeks instead of the usual four to six. You will get better results by waiting for a stretch of warm, clear weather.
Does soil solarization kill beneficial organisms too?
Solarization does reduce some beneficial organisms near the soil surface, but most recover quickly once the plastic is removed. Many beneficial microbes live deeper in the soil where temperatures stay lower, helping them survive the process.
Research shows that beneficial organisms tend to recolonize treated soil faster than harmful ones. The net effect is usually a healthier, more balanced soil ecosystem.
How thick should the plastic sheet be?
For most home gardens, a clear polyethylene sheet with a thickness of about 0.001 inches works well. In areas with high winds, go slightly thicker at 0.0015 inches to prevent tearing.
For very small beds, 0.004-inch plastic provides extra durability. Avoid using opaque, milky, or translucent plastic, as it reflects heat rather than transmitting it into the soil.
Can I solarize raised beds?
Yes, raised beds work well for solarization and can actually make the process easier. The elevated sides help contain the plastic and prevent weed seeds from blowing in from surrounding areas.
Make sure the plastic sits flat against the soil surface without air pockets. The same principles apply: irrigate to 12 inches deep, use clear plastic, and leave it in place for four to six weeks during the warmest months.
Final Thoughts
For farmers and home gardeners alike, soil solarization is one of the most affordable and effective ways to improve your soil. The process is simple: prepare the bed, irrigate, cover with clear plastic, and let the sun do the work over four to six weeks.
Solarization reduces weeds, pests, and pathogens without chemicals, giving your next planting season a strong start. Agriculture professionals and home growers alike rely on this technique to build healthier, more productive soil year after year.