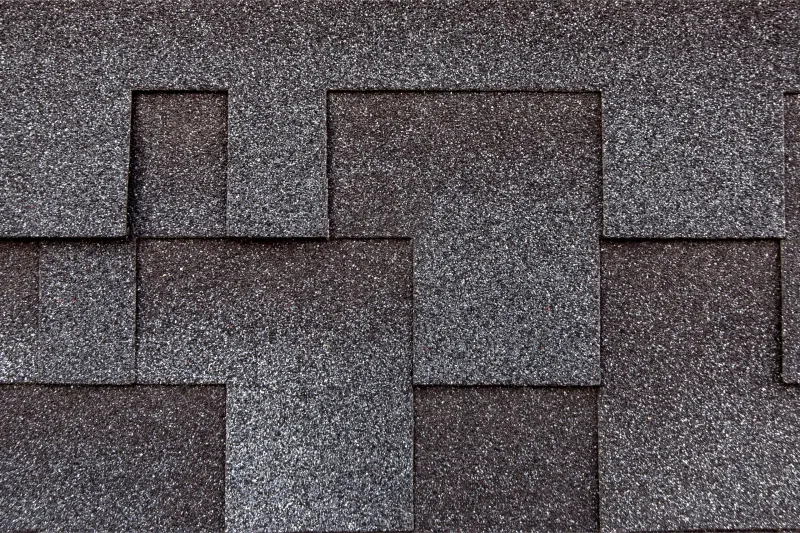
EPDM rubber membranes cover millions of flat roofs across the United States, from residential extensions and garages to commercial warehouses. Their flexibility and UV resistance make them a reliable roofing solution that lasts 25 to 30 years with minimal upkeep.
But that same flexibility creates a real challenge when you want to go solar. Standard rooftop mounting hardware designed for asphalt shingles or standing seam metal can puncture, stretch, or compromise the rubber membrane underneath.
Below, you’ll find every viable mounting approach for rubber roofs, step-by-step installation instructions for each one, and the structural, waterproofing, and code requirements that keep your system secure and your roof leak-free.
What Makes EPDM Rubber Roofing Different for Solar Projects
EPDM (ethylene propylene diene monomer) is a synthetic rubber membrane engineered for flat and low-slope roofs. It resists UV radiation, ozone exposure, and temperature extremes ranging from -40°F to 300°F, which is why it dominates the commercial and residential flat-roof market.
Unlike rigid materials such as asphalt shingles or corrugated metal, EPDM stretches and contracts with seasonal temperature shifts. That elasticity is what keeps the membrane waterproof — but it also means conventional lag bolts and L-brackets can tear the surface over time.
EPDM comes in two configurations: fully adhered (bonded flat to insulation board with adhesive) and mechanically attached (fastened at seams with concealed screws). Which type you have directly affects your mounting options and whether any penetration is safe.
Three Proven Approaches for Mounting Solar Panels on a Rubber Roof
The three main options are ballasted (weighted), adhesive-bonded, and mechanically fastened — each suited to different structural and wind conditions.
Not every rubber roof calls for the same hardware. The right mounting strategy depends on your roof’s structural capacity, local wind exposure, and membrane configuration.
Each comes with different trade-offs in weight, cost, complexity, and durability. Knowing all three before you commit prevents costly rework.
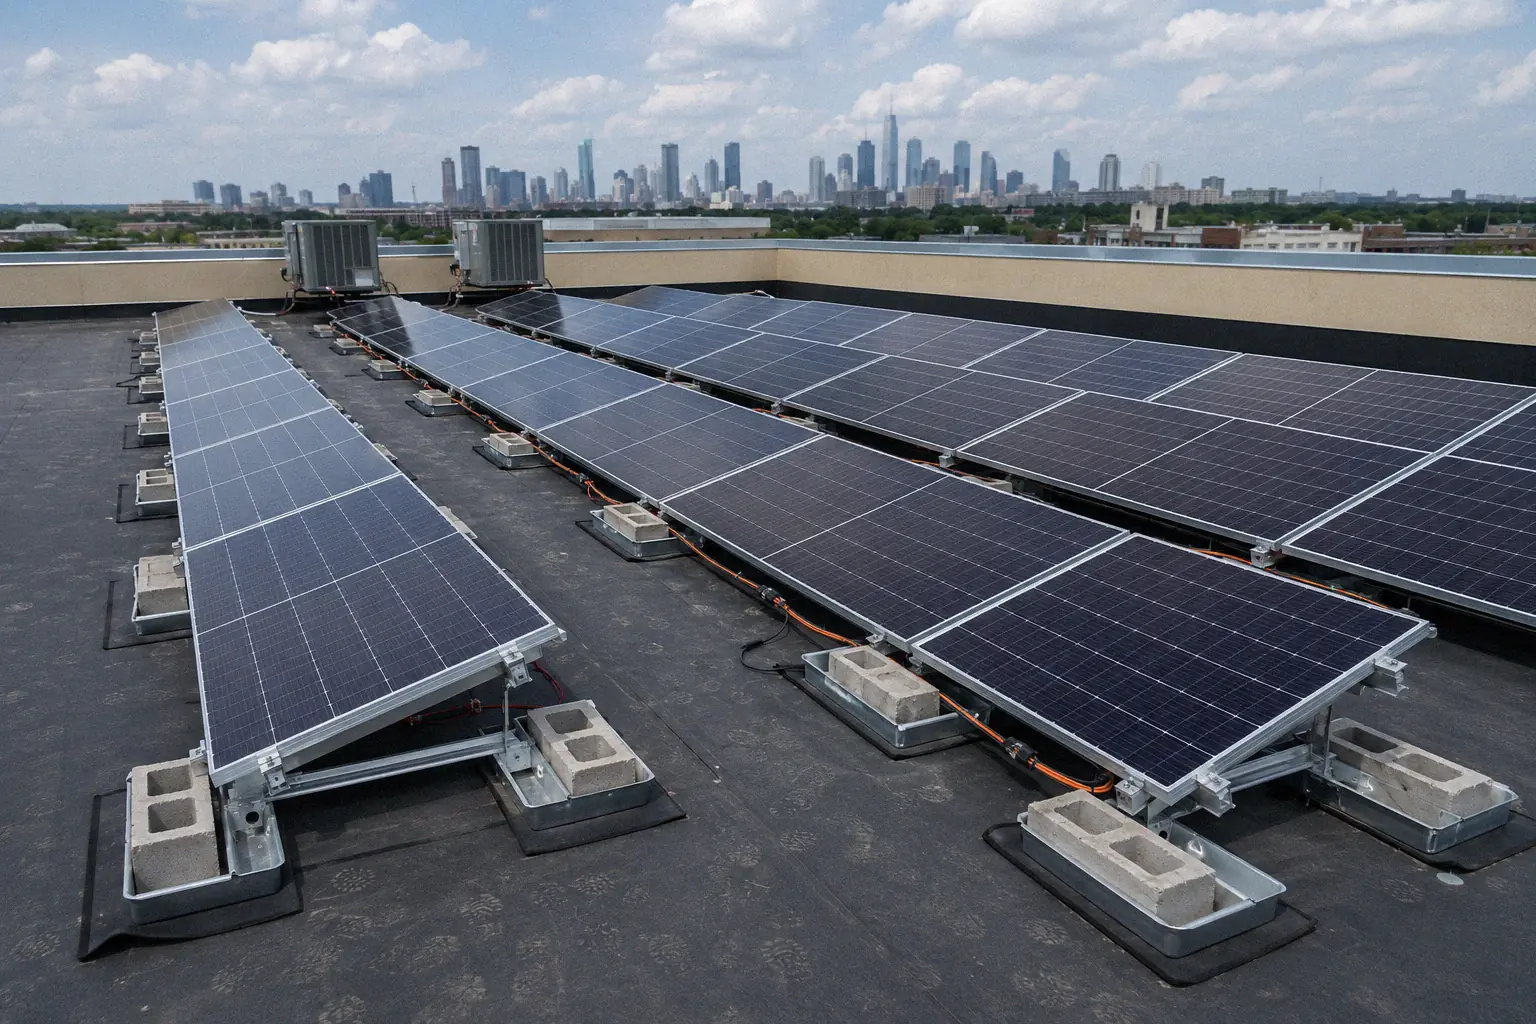
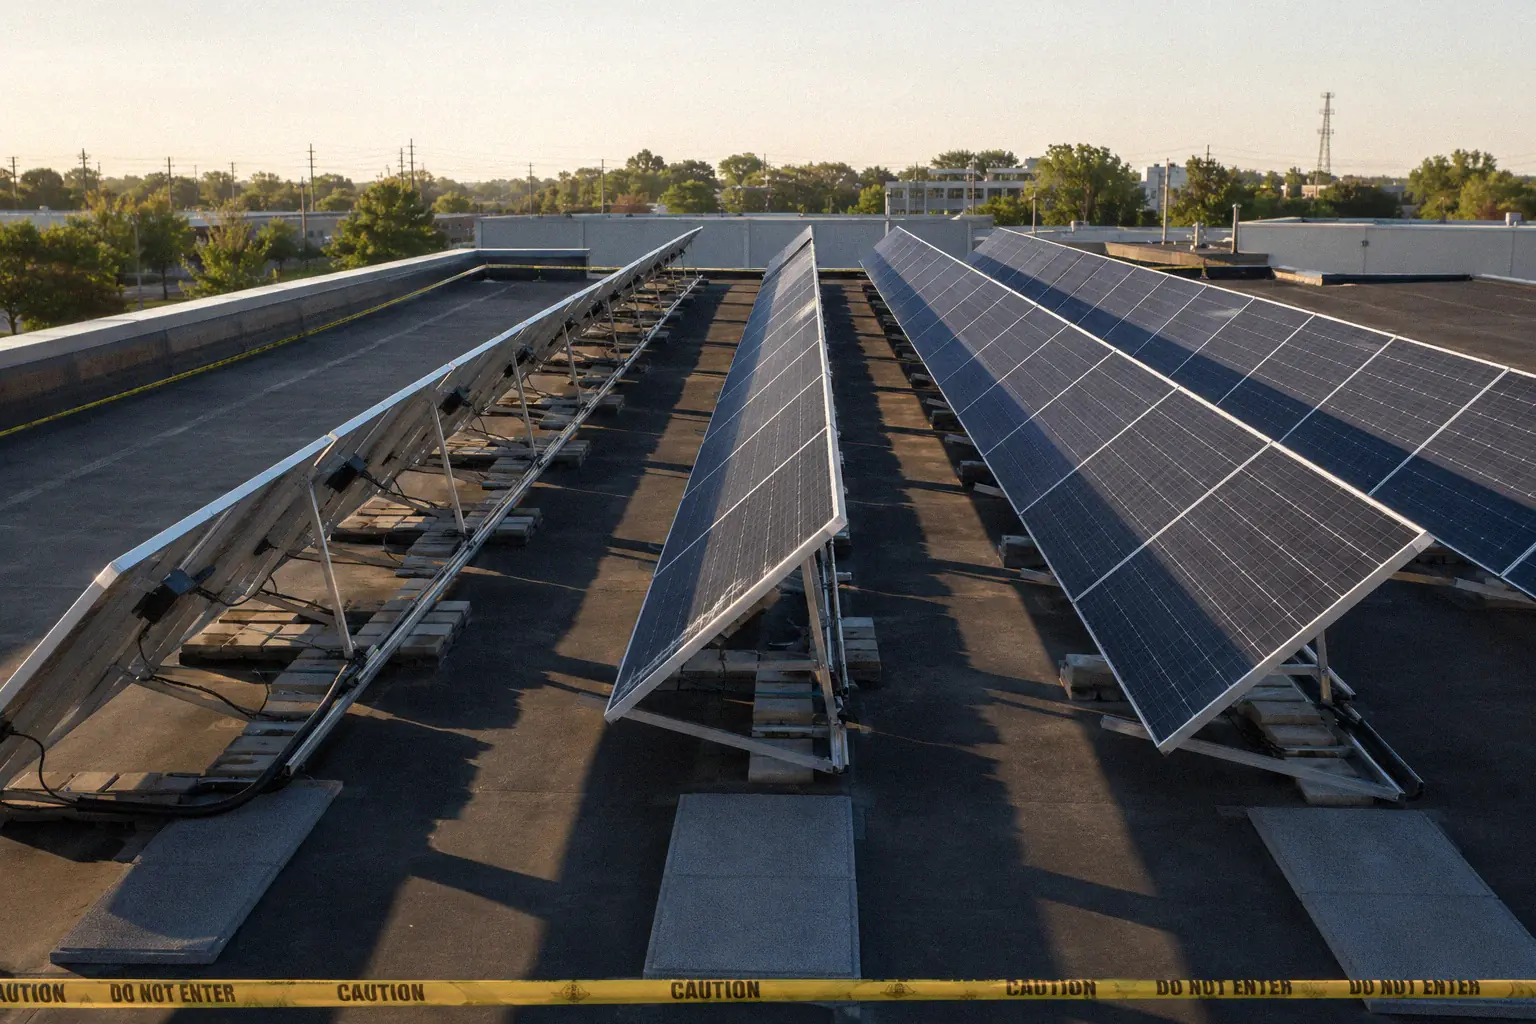
Ballasted (Weighted) Mounting Systems
Ballasted systems rely on concrete blocks, pavers, or purpose-built ballast trays to hold panels in position through gravity alone. No screws, bolts, or adhesive compounds touch the EPDM membrane.
Protective slip sheets or walkway pads sit between the ballast hardware and the rubber surface to prevent abrasion during seasonal thermal cycling as the roof expands and contracts. That buffer layer matters most on fully adhered EPDM, where even minor surface damage can weaken the bond to the insulation below.
Ballasted racking is the most widely used option for flat rubber roofs because it preserves the membrane warranty and simplifies future removal. The trade-off is added weight, typically 3 to 5 additional pounds per square foot beyond the panel weight itself.
Adhesive-Bonded Mounting Systems
Adhesive-bonded systems attach mounting rails or base plates directly to the EPDM surface using structural adhesive formulated for rubber membranes. This approach eliminates both ballast weight and membrane penetration.
The bonding compound must be designed specifically for EPDM contact. Standard construction adhesives degrade rubber and fail within months.
Carlisle SynTec and Firestone Building Products both publish approved adhesive lists for their EPDM membranes.
Bonded systems suit lightweight arrays and roofs with limited load-bearing capacity. Adhesive joints are finicky about surface cleanliness and temperature, so professional installation pays for itself.
Mechanically Fastened (Penetrating) Systems
Penetrating mounts bolt through the EPDM membrane into the structural deck or rafters below. They deliver the strongest uplift resistance while using the least roof area.
Every penetration point requires waterproofing with an EPDM-compatible flashing boot, butyl tape, and a rubber patch bonded over the top. Poorly sealed penetrations are the leading cause of post-installation leaks on rubber roofs.
Go with penetrating mounts when ballast weight exceeds your roof’s structural limit or when local wind codes demand mechanical anchorage. It is also the standard approach on RV rubber roofs, where adhesive bonds face constant vibration stress during travel.
Mounting Method Comparison
Here’s how the three rubber roof solar mounting methods compare across the factors that matter most.
| Feature | Ballasted | Adhesive-Bonded | Mechanically Fastened |
|---|---|---|---|
| Membrane penetration | None | None | Yes (sealed) |
| Added roof load | High (3–5 psf extra) | Low (under 1 psf) | Low (under 1 psf) |
| Wind uplift resistance | Moderate | Moderate | High |
| Warranty impact | Minimal | Varies by adhesive | May void if unapproved |
| DIY feasibility | Moderate | Difficult | Difficult |
| Ideal application | Flat EPDM with strong deck | Lightweight arrays | High-wind zones and RVs |
What Type of Solar Panel Works Best on a Rubber Roof?
Rigid monocrystalline panels deliver the highest wattage per square foot and pair well with standard flat-roof racking on EPDM. Flexible thin-film panels weigh significantly less, making them a practical choice for RVs or weight-restricted roofs — though they produce less power per panel.
Assessing Your Rubber Roof Before Installation
You need a thorough roof inspection before any solar work starts. Skip this step and you’re gambling with panel instability, membrane failure, or a voided warranty.
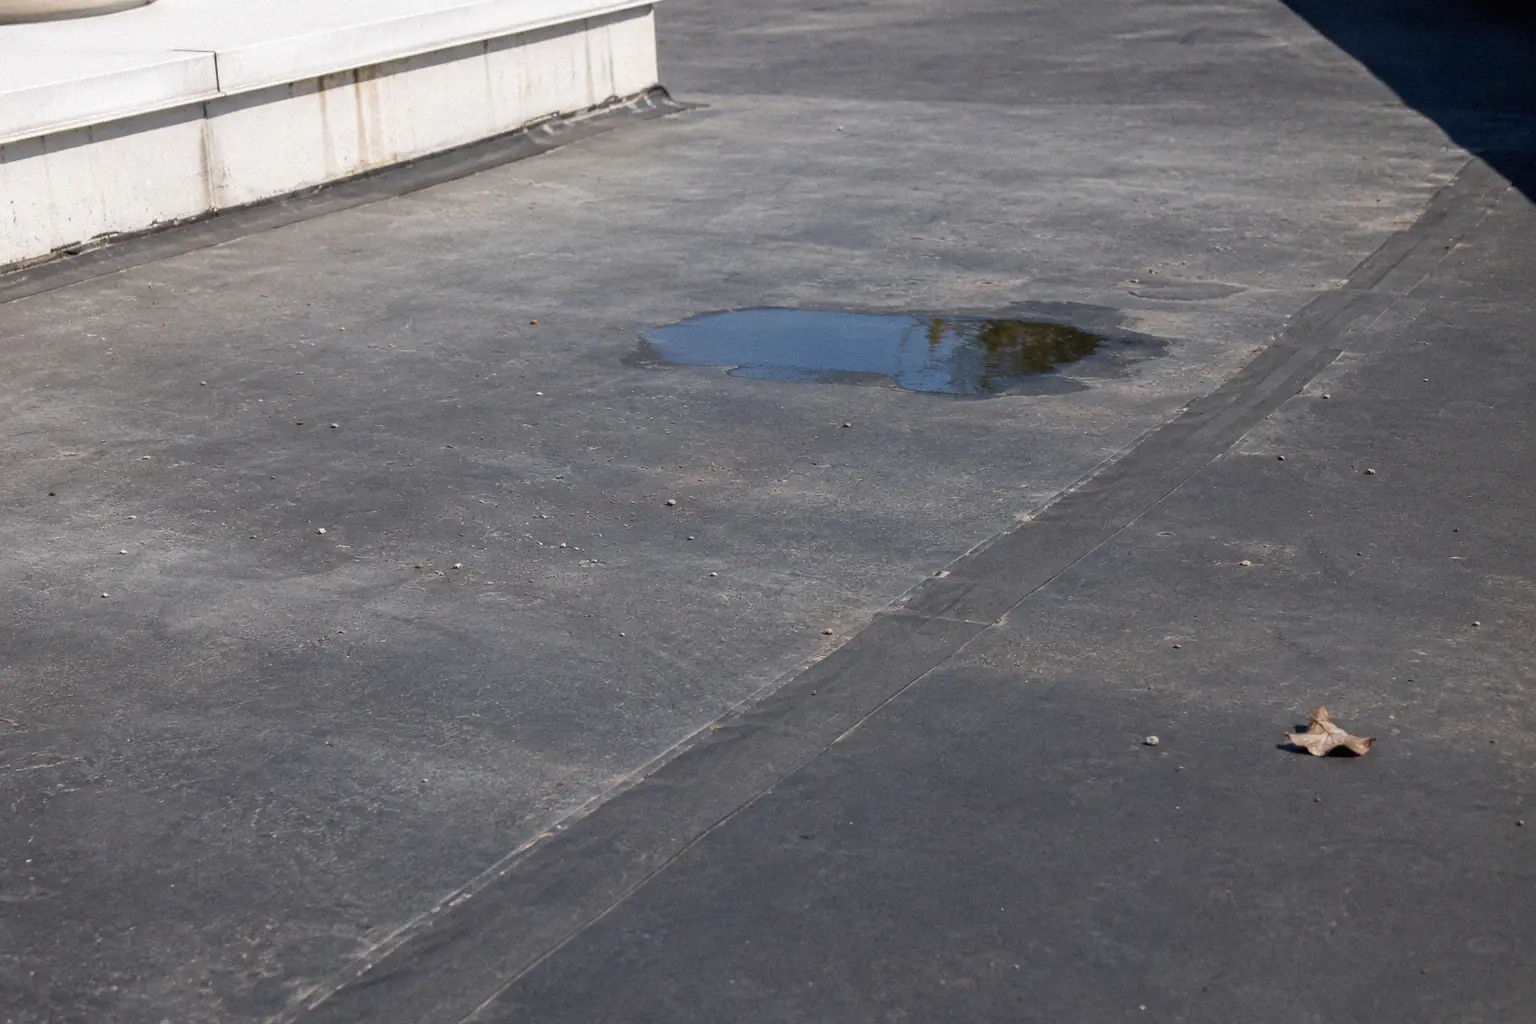
Membrane Condition and Age
Walk the entire roof surface and look for punctures, bubbles, lifted seams, and areas of standing water. Any existing damage must be repaired before mounting hardware goes on.
EPDM membranes older than 20 years may not have enough remaining service life to justify a solar array that will last another 25 to 30 years. It’s cheaper to replace the membrane now than to pull panels off and reinstall them halfway through their productive life.
Structural Load Capacity
Solar panels add 2 to 5 pounds per square foot to your roof. Ballasted racking pushes that to 5 to 10 pounds per square foot once you factor in the concrete weights.
A structural engineer should verify that your joists, decking, and bearing walls can handle the added dead load alongside local snow and wind loads. This review typically costs $300 to $600 and is required by most building departments before they will issue a permit.

Keep in mind that most residential flat roofs are rated for 20 pounds per square foot of live load, but that number already accounts for snow, maintenance workers, and equipment. Subtract your local snow load from that figure to find how much capacity remains for solar hardware.
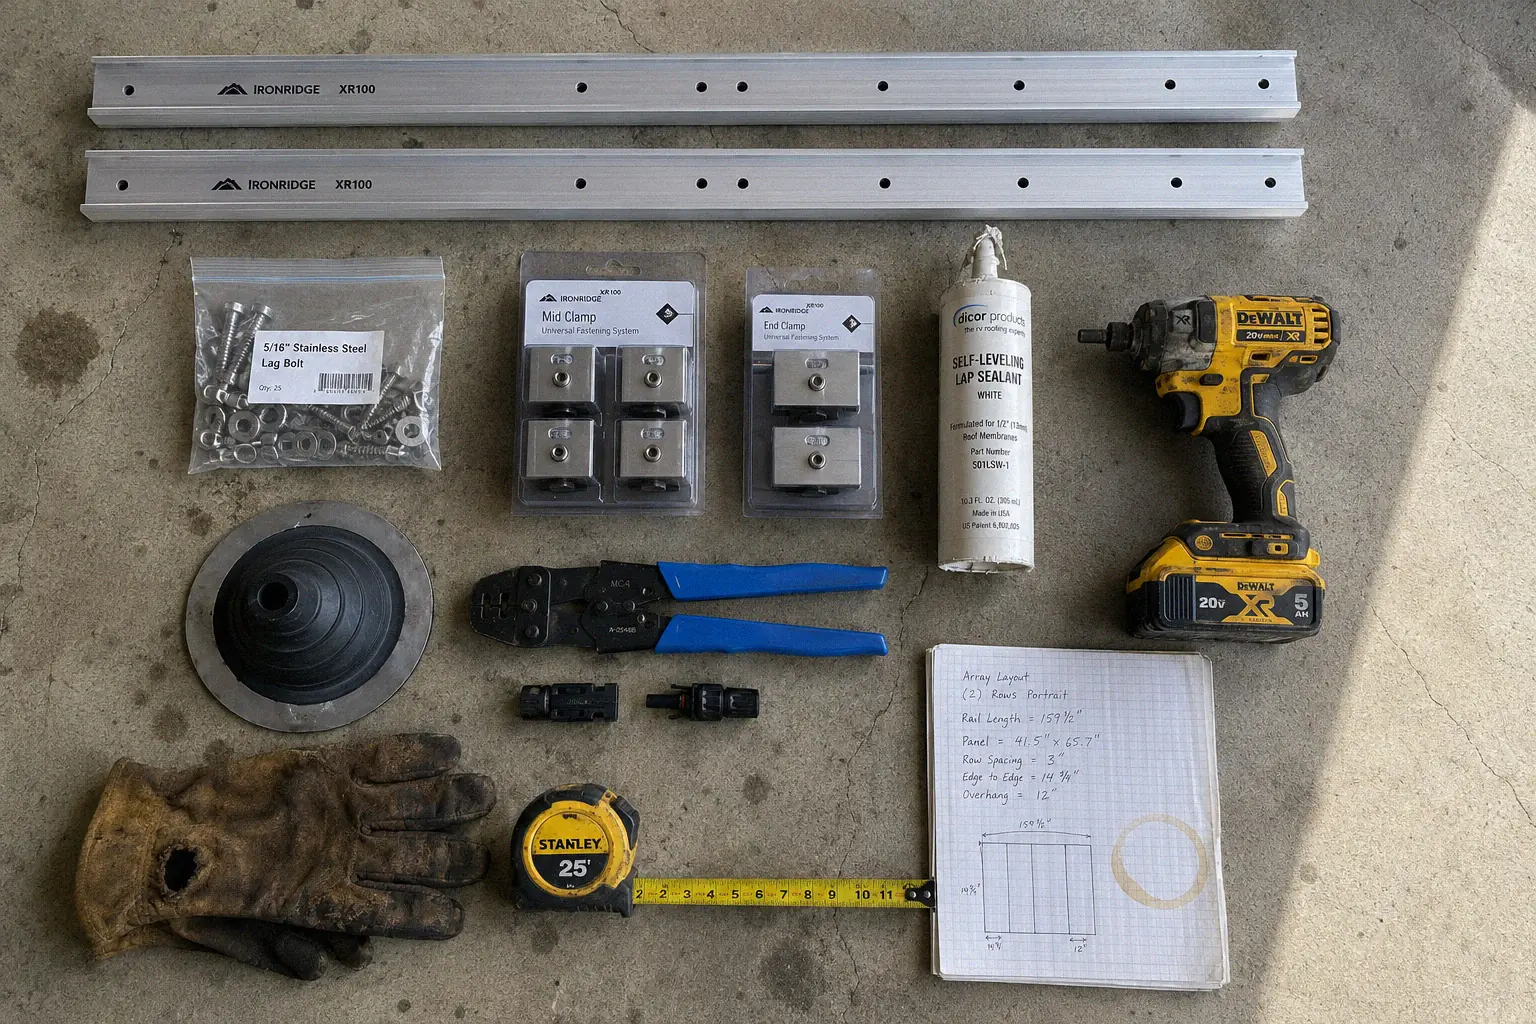
Tools and Materials for the Job
Your exact materials list depends on the mounting method, but every rubber roof solar installation calls for these basics:
- Solar panels sized to your array (monocrystalline or polycrystalline)
- Flat-roof racking system with mounting rails and clamps
- EPDM-compatible lap sealant (Dicor or manufacturer-approved equivalent)
- Protective walkway pads or slip sheets
- Stainless steel fasteners (to prevent galvanic corrosion against aluminum rails)
- MC4 connectors and PV wire rated USE-2 or PV Wire
- Conduit, junction boxes, and a DC disconnect (per NEC Article 690)
- Safety harness, non-slip footwear, and portable roof edge protection
Ballasted setups also require concrete blocks or manufactured ballast trays. Adhesive-bonded installations call for EPDM-specific bonding adhesive and membrane primer.
Penetrating mounts need flashing boots, butyl tape, and EPDM patch material for each bolt location.
How to Install a Ballasted Solar System on EPDM
Ballasted installation is the most straightforward option for flat rubber roofs. Here’s how to get a stable, watertight result.
Lay protective walkway pads across every spot where ballast trays or concrete blocks will rest. Position the trays according to the racking manufacturer’s layout diagram, spacing them evenly to distribute weight across the widest possible area.
Set the mounting rails into the ballast trays and use the built-in adjusters to bring everything level. Attach the tilt brackets to achieve your target panel angle, typically 10 to 15 degrees on a flat roof.
Slide each solar panel into the rail clamps and tighten the mid-clamps and end-clamps to the manufacturer’s torque specification. Connect panels in series or parallel based on your inverter and battery design.
Add the required ballast weight to each tray position. The exact weight depends on your local wind speed zone and the racking manufacturer’s engineering tables.
Under-ballasting is dangerous and can send an entire panel row airborne in a strong gust.
How to Install an Adhesive-Bonded Solar System
Put simply, adhesive mounting success comes down to thorough surface prep, proper primer, and enough cure time before loading the bond with panel weight.
Adhesive installations require precise surface preparation. The ambient temperature during application must stay between 50°F and 90°F for the bond to cure at full strength.
Clean the EPDM surface with a membrane-approved cleaning solution and allow it to dry completely. Apply EPDM primer to both the membrane and the underside of each mounting base plate to promote adhesion.
Spread the bonding adhesive evenly across both primed surfaces and press the base plates firmly into place. Weight or clamp each plate for the full cure time specified on the adhesive data sheet, usually 24 to 48 hours.
After the adhesive has fully cured, bolt the mounting rails to the base plates and install panels using the standard rail-and-clamp process. Don’t load the joints with panel weight before they’ve fully cured — the adhesive will slowly creep and the whole array can shift.
How to Install a Mechanically Fastened System
Penetrating installations call for the most waterproofing skill. Every hole you drill through the membrane is a potential leak path for the next 25 years.
Use a stud finder or building drawings to locate the structural members beneath the membrane (wood rafters, steel purlins, or concrete deck). Mark each fastener location and confirm that no existing roof fasteners or utility lines sit below.
Drill pilot holes through the EPDM membrane and into the structural member. Secure each mounting bracket with stainless steel lag bolts, tightening to the specified torque without over-compressing the roof decking.
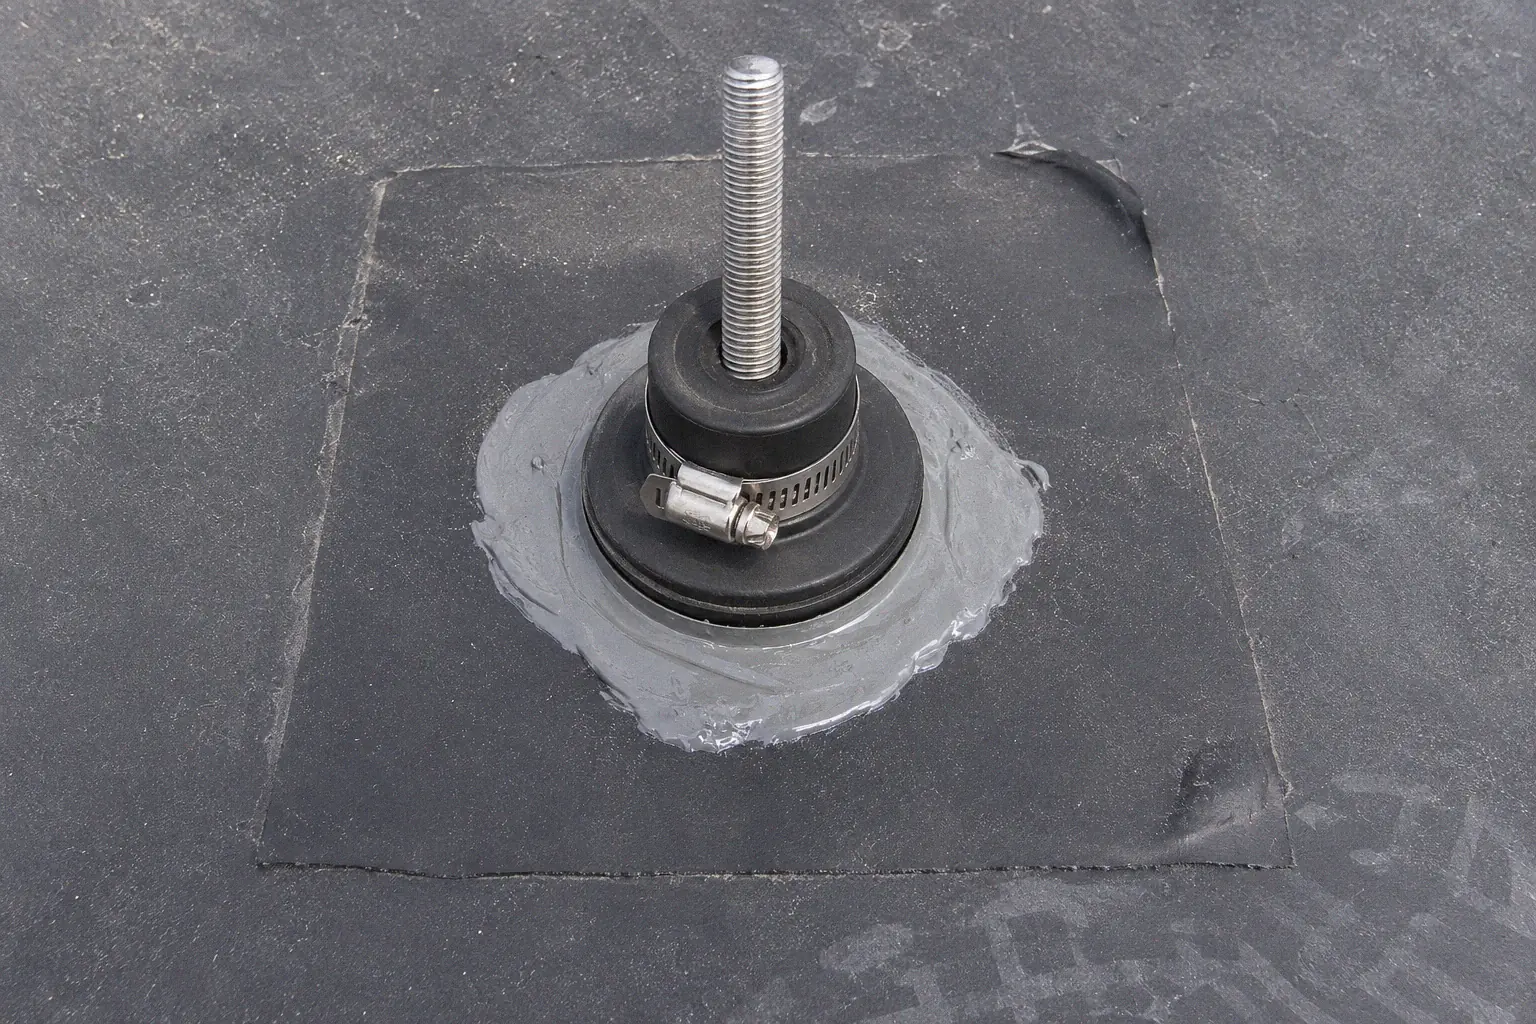
Apply a generous bead of EPDM lap sealant around every bolt head. Press an EPDM flashing boot over each bracket, seal it with bonding adhesive, and cover the full assembly with a rubber patch that extends at least 6 inches beyond the boot on all sides.
This triple-layer seal is your primary defense against water intrusion.
Waterproofing and Membrane Protection Strategies
Keeping the EPDM membrane intact is the single most important part of any rubber roof solar project. One failed seal can mean thousands of dollars in water damage to the structure below.
Never drag equipment, tools, or panels directly across the membrane. Always use walkway pads or plywood sheets as temporary pathways during the entire installation process.
Once the work is done, inspect every seam, patch, and sealant joint. Spray-test the roof with a garden hose and check for drips from inside the building before you pack up.
For penetrating systems, maintain a log of every sealant and flashing location. Butyl tape and lap sealant have a functional lifespan of 10 to 15 years and will need reapplication well before the solar panels reach end of life.
For adhesive-bonded and ballasted systems, check the walkway pads and slip sheets beneath the hardware for wear or displacement during each inspection. Shifted pads expose raw membrane to direct metal contact and gradual abrasion damage.
Reviewing proven installation techniques before you start reduces the likelihood of accidental membrane damage.
What Sealant Should You Use for Solar Mounts on EPDM?
Use only sealants rated specifically for EPDM rubber, such as Dicor self-leveling lap sealant or your membrane manufacturer’s approved product. Silicone and polyurethane formulas degrade EPDM rubber and should never be used on rubber roof installations.
Optimal Tilt Angle and Panel Layout on Flat Rubber Roofs
Flat roofs offer complete freedom to angle panels toward the sun, unlike pitched roofs that lock you into a fixed orientation. This flexibility can increase annual energy production by 10 to 25 percent compared with panels lying flat against the surface.
For most locations in the continental United States, a tilt angle between 20 and 35 degrees facing due south delivers the highest year-round energy yield. Steeper angles favor winter output while shallower angles favor summer months.
Leave a minimum of 12 inches between panel rows to prevent inter-row shading and promote airflow beneath each module. Proper spacing also makes routine cleaning easier and helps you maintain maximum efficiency throughout the system’s life.
Wind Load Requirements and Engineering Standards
Flat roofs take more wind uplift than pitched roofs because air flowing over the building edge creates a low-pressure zone that pulls upward on the array. ASCE 7 (Minimum Design Loads and Associated Criteria for Buildings and Other Structures) is the standard engineering reference used across the country.
Panels positioned near roof edges and corners face the greatest uplift forces. Engineering layouts typically call for 50 to 100 percent more ballast weight or fastener density in these perimeter zones compared with the center of the roof.
For ballasted systems, many engineers specify a minimum of 5 pounds per square foot of ballast in the central field and up to 10 pounds per square foot along exposed edges and parapet corners.
Your racking manufacturer provides project-specific wind load engineering letters stamped by a licensed PE. Building departments won’t approve a solar permit without them, so get these in hand before you start.
Building Permits, Electrical Codes, and Safety Requirements
Most jurisdictions require both a building permit (for structural loads) and an electrical permit (for the photovoltaic system) before any rooftop solar installation can proceed. The permitting process confirms your system meets the International Building Code (IBC) for structural integrity and the National Electrical Code (NEC) for wiring safety.
NEC Article 690 governs photovoltaic systems specifically, covering conductor sizing, overcurrent protection, equipment grounding, rapid shutdown compliance, and required setbacks from roof edges to ensure firefighter access.
Once everything’s in place, schedule a final inspection with your local building department. A passing inspection protects you legally, satisfies your utility’s interconnection requirements, and is mandatory for claiming federal tax credits.
DIY Installation vs. Hiring a Professional
| Factor | DIY | Professional Installer |
|---|---|---|
| Typical cost | $1,500–$4,000 (materials) | $6,000–$15,000 (turnkey) |
| Permit handling | Owner files and manages | Installer handles all paperwork |
| Warranty coverage | Panel manufacturer only | Workmanship + panel + racking |
| Membrane damage risk | Higher (limited experience) | Lower (trained roofing crews) |
| Code compliance | Self-verified | PE-stamped engineering |
| Project timeline | 2–4 weekends | 1–3 business days |
DIY makes financial sense for small arrays on RV roofs, sheds, or detached garages where permit requirements are light. For a primary residence or commercial building, hiring a NABCEP-certified installer protects your roof warranty, ensures code compliance, and qualifies you for the full federal Investment Tax Credit.
Cost Breakdown for Rubber Roof Solar Installations
Rubber roof solar projects run 10 to 20 percent higher than pitched-roof installations due to specialized racking and extra waterproofing labor.
| Cost Item | Estimated Range | Notes |
|---|---|---|
| Solar panels (6 kW system) | $6,000–$9,000 | Monocrystalline, 400W modules |
| Flat-roof racking system | $1,000–$2,500 | Ballasted or adhesive type |
| Ballast materials | $200–$600 | Concrete blocks or pavers |
| Waterproofing supplies | $150–$400 | Flashing boots, sealant, patches |
| Structural engineering review | $300–$600 | Required for building permit |
| Electrical work and permits | $500–$1,200 | Wiring, disconnect, inspections |
| Professional installation labor | $2,000–$4,000 | Typical 1–3 day project |
| Total (professionally installed) | $10,150–$18,300 | Before incentives |
These figures reflect 2026 national averages. Your actual cost varies by region, array size, and roof complexity.

With the 30 percent federal ITC factored in, most homeowners recoup their rubber roof solar investment within 7 to 10 years through electricity savings and net metering credits.
Federal Tax Credits and State Incentives
The federal Investment Tax Credit (ITC) currently covers 30 percent of total solar installation costs, including equipment, labor, and permit fees. On a $14,000 installed system, that equals a $4,200 credit applied directly against your federal tax bill.
Many states layer additional rebates, performance-based incentives, or property tax exemptions on top of the federal credit. Net metering programs allow you to sell excess electricity back to your utility, further reducing your monthly bill.
Search the DSIRE database (Database of State Incentives for Renewables and Efficiency) for current programs in your state. Claiming the ITC requires a completed building inspection and utility interconnection approval, so skipping the permit process disqualifies you from the biggest financial benefit.
Understanding how residential solar systems operate helps you right-size the array and maximize every available incentive.
Maintenance and Long-Term Roof Care After Installation
Inspect your roof and solar array at least twice per year, once in spring and once in fall. Examine all sealant joints, flashing boots, and ballast positions for shifting, cracking, or material breakdown.
After any major storm, clear debris from beneath and around the panels. Leaves, branches, and standing water speed up EPDM degradation and create hot spots that drag down panel output.
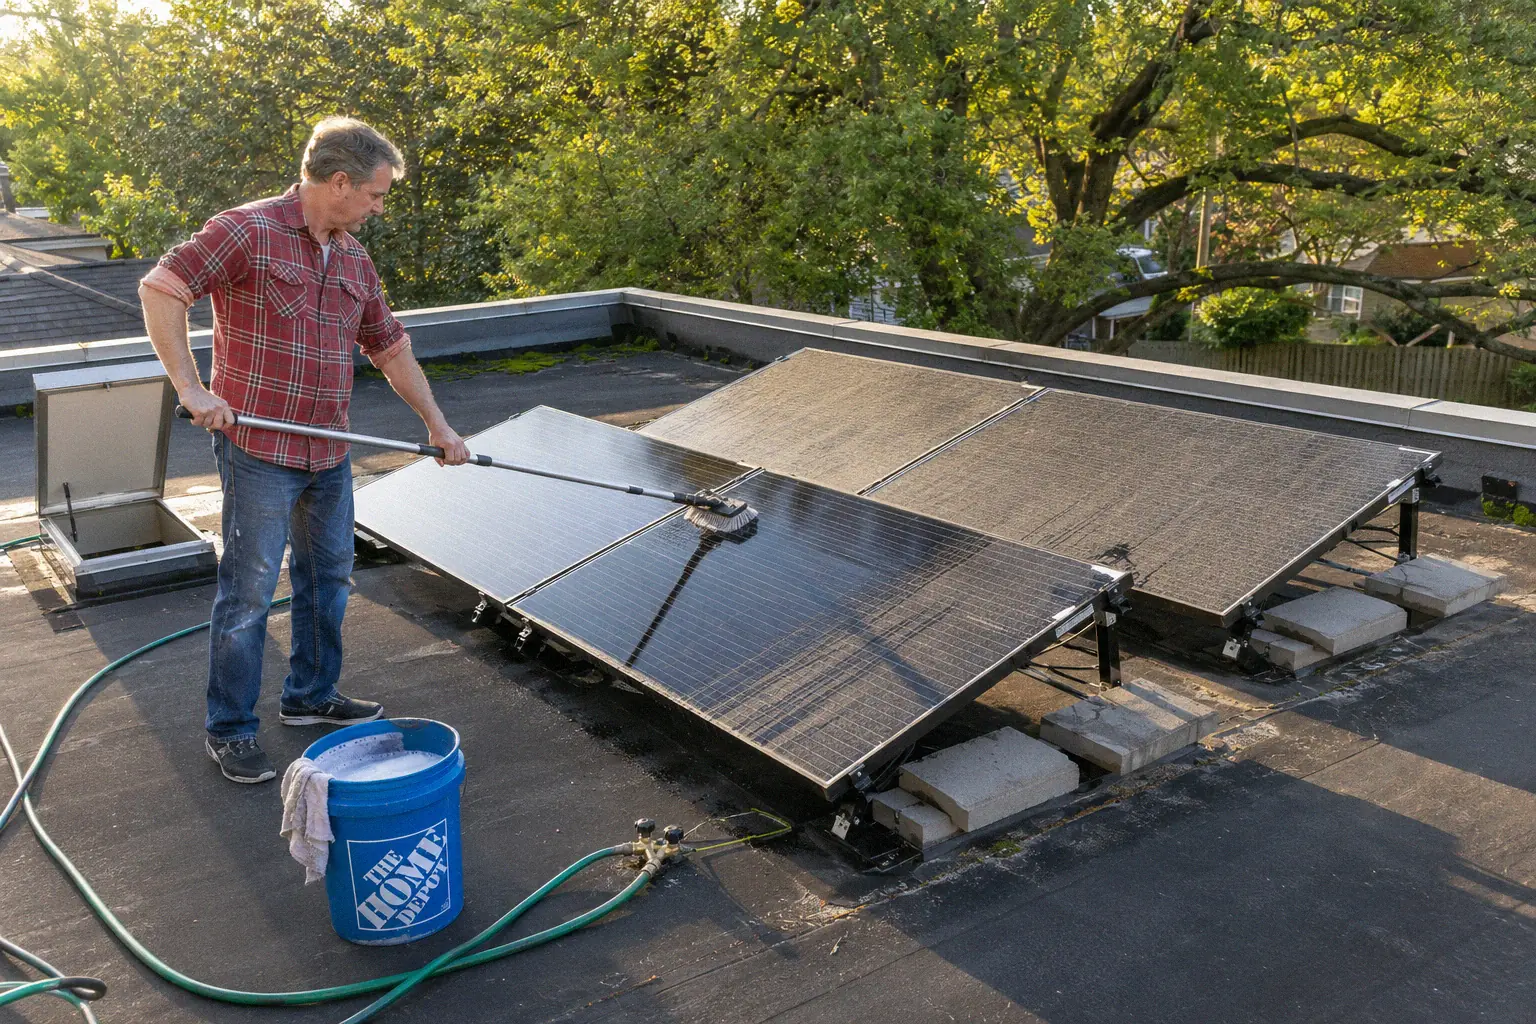
Flat-mounted panels collect more dust, pollen, and bird droppings than tilted rooftop arrays on pitched homes. Wash them with plain water and a soft-bristle brush once or twice a year to preserve rated output.
Building hail and weather protection into your maintenance routine safeguards both the panels and the membrane underneath.
Common Mistakes That Cause Leaks and Damage
Most rubber roof solar failures trace back to five preventable errors: wrong sealant, structural shortcuts, insufficient ballast, seam penetrations, and blocked drainage.
Applying the wrong sealant. Silicone-based and polyurethane sealants are chemically incompatible with EPDM rubber. They break down the membrane surface and fail within months. Use only sealants labeled specifically for EPDM.
Skipping the structural review. Ballasted arrays can add 500 to 2,000 pounds to a residential roof. Without a professional engineering assessment, you risk sagging joists, cracked decking, or outright structural failure.
Reducing ballast weight. Pulling a few concrete blocks to save weight feels harmless — until a 60 mph gust lifts an entire panel row off the building. Always follow the manufacturer’s ballast tables to the letter.
Fastening into membrane seams. Penetrating mounts should never land on an EPDM seam. Driving a fastener through seam tape destroys the waterproof bond and creates a leak that is extremely difficult to repair after the fact.
Blocking drainage paths. Solar hardware and ballast trays can redirect rainwater into areas that previously drained freely. Verify that water still flows to your existing roof drains and scuppers after every piece of equipment is in its final position.
Frequently Asked Questions
Can you mount solar panels on an RV rubber roof without drilling holes?
Yes. Adhesive-bonded brackets and VHB (very high bond) tape systems attach directly to the rubber membrane without any penetrations.
Clean the surface with an EPDM-approved solvent, apply the adhesive, and allow a full 48-hour cure before driving or exposing the system to wind.
How much weight can a flat EPDM roof support for solar?
Most residential flat roofs are engineered for a live load of 20 pounds per square foot. Solar panels with ballasted racking add 5 to 10 psf.
A structural engineer can confirm your specific roof’s capacity based on joist dimensions, spacing, and span length.
Will mounting solar panels void my rubber roof warranty?
That depends on the mounting method and the membrane manufacturer’s policy. Ballasted systems that avoid direct membrane contact almost always preserve warranty coverage.
Penetrating mounts require manufacturer-approved flashing procedures and documentation. Get written confirmation from your roofing manufacturer before any work begins.
How long do solar panels last on a rubber roof?
Modern solar panels produce at rated capacity for 25 to 30 years, which lines up well with a typical EPDM membrane’s lifespan. Try to install both at roughly the same stage of their life cycle so you don’t end up pulling panels mid-life just to replace the roof.
Is a building permit required for solar on a flat rubber roof?
In most U.S. cities and counties, yes. You typically need both a building permit covering structural loads and an electrical permit for the PV system itself.
Permit fees range from $200 to $500 depending on jurisdiction, and a final inspection is required before you can claim federal tax credits or connect to the grid.