Soil solarization is one of the simplest ways to kill weeds without chemicals. The steps below are in order for a reason, so read through them once before you start and follow along as you go.
Soil Solarization as a Savior
Have you heard of soil solarization?
This is an effective natural method that will help weed control and let your garden grow.
Soil solarization requires a bit of time and effort. However, you’ll be proud of the results!
Below are 10 steps to help you understand what this practice is and how to get rid of these unwanted guests for good and enjoy a weed-free garden.
What is Soil Solarization?
Soil solarization technique is a non-chemical system used to effectively eliminate weeds and prevent their re-growth.
It is great both for commercial and private gardens as it aims to kill weeds.
This method is mostly used in hot and sunny territories, making it a natural fit if you already use rooftop solar systems or other sun-powered solutions at home.
The process should be done during the summer.
But, there are ways to still put it in action during winter or in cooler areas.
Thanks to the sun’s heat and powerful energy, soil solarization encourages a physical and biological transformation of the soil and kills weeds by suppressing and eliminating plant pathogens that cause the growth of unwanted weeds.
How to achieve this?
You will need to treat and then cover the soil with clear plastic for several weeks during summer.
If successful, soil temperatures will go up to 125° F (52 ° C).
This will kill the pests while releasing precious nutrients into the soil.
This method is usually more efficient at the soil surface.
Effectiveness decreases in the deeper layers of the soil.
However, research by American horticulturists shows that soil solarization contributes to weed control and suppresses weeds both short and long term.
If you’re fed up with those persistent weeds and you don’t want to use chemicals, opt for soil solarization.
So let’s start!
Basics of Soil Solarization
Solarization raises soil temperatures to a particular level for the desired time frame to kill weeds, insects, and pests and prepare the soil or bed for the next planting season.
Natural solarization provides mild soil temperature, while the artificial solarization process consists of heat carried out through a source of about 70-100 degrees Celsius.
Solarization allows farmers to protect their soil and crops from harmful pathogens and bacteria.
- It raises soil temperatures to kill weed seeds, pests, and insects.
- It is a pest and weed control technique that improves soil health by advancing the nitrogen content and nutrients to the growing crops.
- It decomposes organic materials and releases soluble components/nutrients like nitrogen, magnesium, calcium, fulvic acid, and potassium, which are efficient for the plant’s growth.
- It allows plants to grow faster.
- It builds beneficial microorganisms.
A useful first step is to learn some basics about weeds.
What Are Weeds?
There are a lot of kinds of weeds, with different characteristics.
To understand whether you need to go ahead with solarization, you might want to check if the weeds in your garden are damaging other plants or not.
Clovers, dandelions, pennycress, or chickweed are just a few examples of weeds that you can keep on your lawn.
These types of plants have beautiful flowers.
They can bring some color and variety to your outdoor space.
Some of them are also edible and have multiple hidden qualities!
If you decide to leave some of these weeds in your garden, just make sure to keep an eye on them regularly.
It’s important to check whether they’re spreading too much.
If they do, just pull out the extra ones to keep it tidy.
We all know that “bad weeds” can grow uncontrollably and can be frustrating.
They take the nutrients, light, and space from your other plants compromising their growth and health.
If you’re fed up with all these unwanted weeds, soil solarization might be your garden’s savior.
Arm yourself with patience and some gardening gloves now!
Then let’s start with it.
What Do You Need to Solarize Weeds?
To successfully solarize your weeds, you need to carefully prepare the space and the soil.
As this is one of the most important parts of the process, make sure that you have all the tools and materials that you need before starting.
So, you’ll need a hedge trimmer, shrub trimmer, or bush trimmer.
Chainsaw is a mechanical saw useful to cut chunkier plants or trees.
Mattock is similar to a pickaxe.
It’s useful for digging and prying rocks out of the soil.
A mower can do the job.
Don’t confuse mowing with reaping, although it uses similar utensils.
Reaping refers to harvesting!
Tiller
This machine breaks up garden soil.
For this specific task, don’t rely on a manual tiller.
You will need some power!
Rake
A normal metal rake is what you need.
Polyethylene Sheet
For this purpose, you can use any sheet between 1 to 6 mm.
Landscape Fabric
You can find synthetic, organic, or recycled fabrics.
Using the stronger fabric is recommended for better results.
Mulch
This is used to maintain the moisture of the soil and improve its fertility.
You can find a different kind of mulch, organic is the best.
A lot of sun and health!
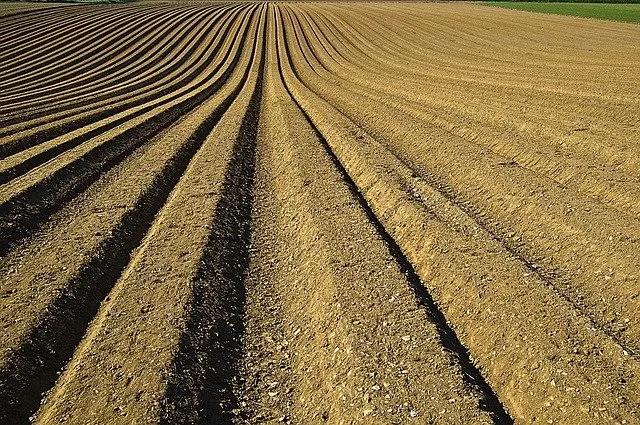
Preparing the Soil for Soil Solarization
Trimming
Now that you have everything that you need in place, you can start the weed control process.
The most important part of it all is the preparation of the soil.
You will certainly need a bit of patience, especially because you will be putting in place a longer herbicide-free method.
Also, be prepared to get your hands dirty.
But don’t give up!
Just keep thinking about the result!
The soil surface you want to treat needs to be thoroughly cleaned up. Eliminating all clods and debris is a must.
If the vegetation is particularly tall, start by taking your power trimmer and cutting down all the extra tall weeds.
Mowing
Once the trimming is complete, proceed with mowing the land.
Make sure that you cover every part of the area.
You might also need to use your chainsaw to eliminate potential shrubs or trees.
For the stumps, just pick up the mattock and dig your way to the roots to be able to remove it all (this is not an easy task!)
You need to remember that this first part of the process aims to make sure the soil is completely clean and smooth.
So, take extra care in making it as clean as you can.
Eliminate all the extra plants and elements that you find.
Tilling
Once you’re satisfied with the result and all the vegetation is as short as possible and all debris removed, take the tiller to uproot the remaining weeds.
A small manual garden cultivator is not going to be enough for this task.
It’s recommended to rent a large tiller or use one with strong power.
Make sure that your tiller is going deep down into the ground to loosen up the stubborn weeds.
This will allow you to eradicate the whole plant easily, roots included.
It’s important to remove the plant in its entirety.
If you leave some of the roots in the ground, they will more than likely sprout again on the soil surface.
If you’ve used the tiller effectively, you should be able to easily brush a metal rake across the soil that you’ve just ‘cleaned’.
Make sure that you’re not leaving any roots or weeds behind.
Once there’s no additional sign of weeds, you can also use the rake to remove potential stones, twigs, and other debris.
Sometimes it can be challenging to get rid of all the roots, stumps, and grass.
If you find yourself in a difficult situation and you don’t know how to proceed, just do your best to get the land as clean as possible.
Then, move on with the next steps.
Last, but not least, take your garden hose and spray the cleaned land to moisten the whole area.
This will help increase the soil temperature by conducting and trapping the heat.
Make sure to make the soil wet enough, but not to oversaturate it.
Solarizing the Soil
The reason why solarization is different and more effective compared to just laying landscape fabric is that it kills weed seeds and prevents weeds from sprouting again.
Solarization’s main perk is long-lasting prevention.
It’s aimed at killing weed seeds that are hiding underneath the ground.
For this goal, landscape fabric is not that effective, particularly on stubborn weeds.
The weeds might still find their way back through the holes that you’ve created to make space for your garden plants.
During the solarization process, before laying the clear plastic to increase soil temperatures, you might want to dig a trench around the outer edges of the garden.
This can be between 8 to 12 inches deep and about a foot wide.
This will help you secure the plastic in place.
It’s now time for you to pick up your clear polyethylene sheet and place it on top of the raked and cleaned soil.
If you haven’t dug the trench, you can use cinder blocks to prevent the sheet from moving or flying away.
You can place the clear plastic edges into the trench and fill it up with the extra excavated soil to secure it.
Make sure to keep the clear plastic as tight as you can.
This is when you’ll be thanking yourself for all the hard work you’ve done with cleaning the land, as no sharp stick will risk damaging the clear plastic and compromise the whole process.
Now, you just have to wait and let the sun do the rest of the work.
Sunlight will increase the soil temperature by killing pathogens and weed seeds.
Leave the clear plastic well stretched on top of the land for up to two months and a minimum of four weeks.
The duration depends on the season, soil temperatures, and other factors.
What Next?
After two months, you can proceed with removing the clear plastic sheet and laying down the landscape fabric.
It’s recommended to use the thickest and strongest kind of fabric you can find, just in case, there’s any sharp object on the ground that could damage the fabric.
Once this is placed you can start perforating it depending on where you want to install your new plants.
Be careful not to get dirt all over your landscape fabric.
This might cause airborne weed seeds to sprout!
The final step of your project is to apply mulch.
You can use the organic type, such as bark mulch.
Evenly distribute a layer of mulch over the land.
Make sure that you don’t pile it up around newly planted plants as this might increase the chances of diseases.
Keep an eye out for old mulch.
When it decomposes, it must be removed swiftly and replaced with a new layer.
Mulch is quite a fertile habitat for weeds.
So make sure that you intervene promptly if some of them sprout.
Roots might damage the fabric below and break it.
With that said, don’t panic!
Weeds that grow from mulch are much easier to eradicate as this type of material is much looser than dirt.
Tips & Tricks for Better Results
This practice can be put in place in different parts of the world.
This means that it can work with different kinds of weather.
You just need to be aware of a few tips.
Tip #1
As you can imagine, in the Northern hemisphere the best time for soil solarization is during summer.
This is during June and July when the sun is at its peak.
This doesn’t mean that you can’t solarize in cooler countries or during fall or winter.
You will just need to keep the clear plastic longer (at least 8 weeks).
The sun will still be able to kill the yet to grow weeds.
However, it might just reach the ones at a shallower level, as it might not be powerful enough to reach deeper layers underground.
Tip #2
Another tip that you can keep in mind when it comes to choosing a plastic sheet is to consider its thickness.
While anything from 1 to 6 millimeters works fine when a hot sun is out, you might want to favor thinner sheets during winter or in cooler soil temperatures.
Choosing a 1 to 2 millimeters plastic sheet will ensure a higher soil temperature.
This is because the material will be able to reflect less solar heat and energy.
However, a slightly thicker clear plastic might work better in windier areas.
For experienced gardeners, to maximize solarization effects, you can also add organic materials into the soil before proceeding with covering it with clear plastic.
Tip #3
This is called “bio-solarization”.
The decomposition of these organic materials, such as composts and crops, releases some specific natural substances such as organic acids, that are toxic to pests or organisms proliferating in the soil.
This additional practice, however, needs to be carefully orchestrated as an excessive amount of residue might turn the soil sour.
Your soil now will be unsuitable for planting.
If you mistakenly alter the soil condition, you can still detoxify it through irrigation.
Heavy soils are ideal for solarization, especially if they have a clay or loam base.
This kind of soil can retain more liquids, allowing the earth to produce steam daily.
That said, light or sandy soils can also be solarized.
To maximize the sun effect and minimize the draining, you can dig some irrigation lines under the clear plastic cover and add water regularly.
The Benefits of Soil Solarization
The benefits of this method are many and not all of them have to do with weeds.
First of all, solarization is a non-chemical practice.
This means that it will not leave any chemical residue in the soil.
This characteristic makes it particularly suitable for home gardens and farms.
In addition, soil solarization is also able to improve soil health by increasing the number of nutrients that allow plants to grow.
Some of the soluble nutrients released in the soil during solarization are nitrogen (from nitrate and ammonium), calcium, magnesium, potassium, and fulvic acid, all precious elements for healthy vegetation.
Successful solarization will allow your plants to grow faster and stronger, on top of preventing the growth of extra weeds. Once your garden is thriving, you can enhance it further with solar garden lights to enjoy the space after dark.
How to Maintain Your Garden After Soil Solarization
After all your efforts in turning your garden into a weed-free zone, you want to make sure that it stays that way.
There are several things that you can do to maintain your garden and keep it tidy after solarization.
To-Do #1
It’s important to check your garden regularly to find out if any weeds are sprouting.
If you spot one of them, make sure that you remove them correctly.
Learning how to pull out a weed in its entirety matters more than most people think.
For example, if the ground is wet, you can use a hand corkscrew weeder or a daisy grubber.
To remove smaller parts, you can simply use a kitchen fork.
If the weather is dry, and the soil a bit harder, you might need the help of a hoe to chop the weeds as close to the soil as possible.
This will dry them up.
Some weeds might be harder to remove as they can grow in difficult spots, between paving stones for example.
To kill this kind of weeds, a weeding knife can come in handy.
Thanks to this tool, you can cut the plant eliminating the roots.
Then, add some mulch to cover the gaps.
To-Do #2
Mowing regularly is also necessary if you want to keep your garden tidy.
Avoid using chemical pest killers.
For a more effective result, you can rake through the lawn before mowing to make sure that the weed’s roots are turned upward and are ready to be cut by the mower.
If you eradicate them or cut them, make sure that you don’t put them in the compost as they might re-germinate there and infest your garden all over again.
A good way to dispose of the dead weeds is to put them in your garden waste bin or burn them so that you’re sure that you’re getting rid of them for good.
However, not all weeds are bad. Some of them taste quite good.
If you want to dispose of those greens differently and give a different twist to your salads, you can add some dandelion leaves to it and enjoy the taste of your hard work! You could even cook them up in a solar oven for a fully off-grid meal.
Frequently Asked Questions
How long does soil solarization take to work?
In hot summer conditions, four to six weeks is usually enough to kill most weed seeds near the surface. Cooler climates or fall timing may require eight weeks or longer.
Check soil temperature under the plastic periodically to gauge progress.
Can I solarize soil during winter?
You can, but results will be less thorough. Winter sun produces lower soil temperatures, so the process mainly affects seeds in the top few inches.
Use a thinner plastic sheet (1-2 mm) and extend the treatment to at least eight weeks for the best outcome.
Does solarization kill beneficial organisms in the soil?
Solarization does reduce some beneficial microbes near the surface, but most recover quickly once the plastic is removed. Deeper soil layers remain largely unaffected, and the nutrient release during the process actually supports healthy regrowth.
Adding compost after treatment helps restore microbial activity even faster.
Will solarization work on all types of weeds?
Solarization is highly effective against annual weeds and many perennial species whose seeds sit in the top several inches of soil. Deep-rooted perennials like bindweed or nutsedge are harder to eliminate because their roots extend below the heated zone.
For those, combining solarization with manual removal gives the best results.
Final Thoughts
Soil solarization proves that effective weed control does not require harsh chemicals. With clear plastic, sunshine, and a few weeks of patience, you can kill weed seeds and pathogens while enriching your soil with valuable nutrients.
The preparation takes real effort, but the payoff is a cleaner, healthier garden that stays weed-free far longer than conventional methods allow. Follow the steps above, keep up with regular maintenance, and your garden will reward you season after season.
If you are still weighing the investment of time and energy, it helps to consider when solar-powered solutions are worth it more broadly. The same sun that powers your home can keep your garden thriving.