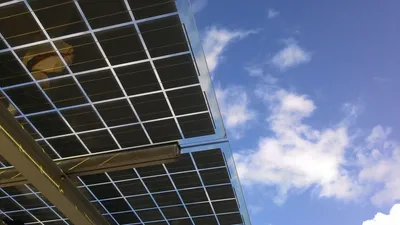
Building a solar panel is simpler than most people think. This eight-step guide covers everything from framing and wiring to testing, so you can avoid common mistakes and get it right the first time.
Step 1: Construct a Frame
Building a frame for your panel to rest is the first step of this process.
For a traditional and straightforward homemade panel, I would recommend just making this out of wood.
For starters, get yourself a large piece of plywood to serve as the base of your frame.
You later cut it down to the precise size needed for your panel based on the number of solar cells you wish to house.
Traditional homemade solar panels contain 60 cells, generally coordinated on a 6×10 horizontal grid.
To keep this tutorial as straight forward as possible, we will assume that it’s the size of the panel you plan to build.
If you wish to build a different size or are merely curious about the standard sizing of panels, I would recommend checking out the following article for greater understanding.
The next thing you need to do with your plywood is to create a template of sorts for where your solar cells ultimately are placed.
To do this, you should start by creating a mock solar cell out of paper, cardboard, or whatever you can easily cut to the size of a typical cell, which is 6×6 inches.
Take your mock solar cell.
Get a ruler or measuring tape.
Put it precisely one inch out vertically and horizontally from the corner of your plywood.
You then place a tile spacer where all four corners of the cell are and use a staple gun to attach them there.
Tile spacers are very inexpensive.
They can be found at any hardware store.
To keep things simple, you can order this mega-pack from Amazon.
Once you have done this, all you need to do is staple down tile spacers on your plywood in six-inch vertical and horizontal increments from each other.
Repeat this until you have created a complete 6×10 horizontal grid where 60 cells would fit in perfectly.
You may be wondering what the need for tile spacers is when you could draw dots instead.
The reason is that you need a small amount of space between each cell.
The spacers naturally provide this gap and ensure that it’s even across the grid.
Once you have your entire grid filled out with tile spacers, cut off the excess wood so that you have a one-inch perimeter around the board.
The purpose of keeping this gap around the perimeter is so that you can build a small border to rest your Plexiglas later.
The border keeps the Plexiglas from pressing right against your solar cells and possibly damaging them.
To build the border, you need to cut down four more pieces of plywood to fit the length and width of the edges of your frame.
They should each measure ½ inch wide and ½ inch tall.
You may have difficulty finding or cutting down wood to these precise measurements.
So I would recommend going to a local hardware store where the workers would be happy to do it for you.
Once you have your border pieces, drill them into your plywood on the matching edges.
You now have completed building your frame.
It should look like a massive picture frame displaying a grid of tile spacers.
While it may seem like a great excess of work before even getting into the technical stuff, having your frame ready makes life much easier down the road.
Step 2: Gathering Your Raw Materials
Now that your frame is all laid out, you must get all the materials you need for the remainder of your panel.
The first and most important thing you need to think about is your solar cells.
While it’s possible to build this from scratch, I would strongly advise against it.
They’re incredibly complicated to build but very easy to purchase.
Most experienced panel builders still purchase their cells premade.
Depending on your budget, you can buy cells from a variety of different sources.
I would recommend going to the hardware store or trustworthy online dealer.
If you want to save a few bucks, however, you can also quite easily find second-hand cells in websites like eBay or Kijiji.
Remember, you need precisely 60 cells of 6×6 inch dimensions.
Along with your cells, there are several other items you need to purchase, if you do not have them already.
These include solder, a flux pen, bus wire, tabbing wire, two different color sets of 22 gauge wire, a soldering iron, silicone, and a caulking gun.
We dive into the exact purpose of these items later in the article.
Again, all of these items should be available for purchase online or at your local hardware store.
If you’re not sure of precisely what these things are and in what quantities, brands, and sizes to purchase them in, I would recommend checking out the following website for more information.
Targray has a wide selection of useful products for this type of project.
They’re incredibly customer-friendly.
Go to their home page and click the option to speak to an advisor.
Here you can send a message inquiring about any issue you seem to be having.
They normally get back to you promptly.
Step 3: Connecting the Tabbing Wire to Your Cells
Once you have gathered all of the previously mentioned items one way or another, cut your tabbing wire into pieces big enough to connect two cells.
You can do this by stretching a piece of tabbing wire from the top of one solar cell to the bottom of the cell below it as they’re laid out on your frame.
Once you have correctly measured out one piece of tabbing wire, you can use this as the template size for the rest of your pieces.
You need 120 pieces of tabbing wire total as you need two each for all 60 of your cells.
For this next part, I must stress the importance of putting some work gloves on, as with any other time in this project, that you’re handling the solar cells.
Even when washed, your hands carry a trace of natural oil in them.
This can reduce the effectiveness of your solar cells when rubbed on them.
So be sure never to handle solar cells with your bare hands.
Now that your gloves are on and you have cut your wire, it’s time to start attaching it to your solar cells.
We start by connecting it to the back of the cells.
We deal with the front later.
First, you must get out your flux pen, make sure the tip of it’s moist with solder, and rub it into the 6 designated white spots you see on the back of a cell.
These spots are designations for where you’re attaching your tabbing wire.
Once you have generously rubbed them all down with your flux pen, it’s time to get out your soldering gun.
These are very hot, so be careful.
The six spots that you see on the back of your solar cells are in two columns of three spots.
You now need to take a piece of wire and use your soldering gun to heat it into one of the three spot columns.
The heat fuses the solder between your wire and the solar cell to keep them firmly connected.
Make sure you’re putting the very top of your wire right at the top spot in the column to ensure that you still have enough wire left for the cell below it.
After you have done it on one side, do the same thing on the three spot column on the other side.
You should then repeat this process with all 60 of your solar cells.
Step 4: Connecting the Cells
Once you have attached the tabbing wire to the back of all the cells, it’s time to start putting them together.
For this, you should lay your cells out on your frame in the designated squares on your tile spacer grid.
You will notice that the front of your cells has two white lines going down.
You need to align these vertically as they’re what the tabbing wire is fused on.
These two lines correspond directly to the two columns of spots on the back of the cells, since you’re connecting these from front to back.
Allow the extra tabbing wire from your cell to dangle beneath it and fall over the top of the cell sitting below.
After you generously rub-down the white lines with solder, use your soldering iron to fuse the two pieces of wire to their corresponding white line.
Continue this process vertically for all of your cells on the entire grid.
Once you have completed this process, you should have ten separate strands of six solar cells connected by tabbing wire.
Step 5: Attaching the Cells to The Frame
Now, it’s time to glue the cells to your frame.
You need a tube of silicone and a caulking gun.
Put small blobs of silicone, about the size of a quarter, in the center of the framed templates for where your cells are going
Then carefully put the cells down on top of the glued spots one-by-one, pushing firmly enough to form a strong bond.
Once you have all of your cells glued to the frame, it’s time to bring out the bus wire.
Cut a piece of bus wire that is large enough to connect the tabbing wire of one cell, essentially forming a connection between the two pieces of tabbing wire.
To connect the bus wire to the tabbing wire, dab the bus wire with solder using the flux pen in the places you’re connecting it.
Then use your soldering iron to fuse them.
Do this to the excess tabbing wire coming from the top left corner of your frame.
Once you have completed that, then do the same thing with the bus wire, but with the first four pieces of tabbing wire, or the first two columns of cells, in the bottom left corner of your frame.
Then keep doing the same thing in two-column increments from top to bottom, essentially creating a snake-like pathway for the energy to flow through your panel.
Once you have fully fused the bus wire to your tabbing wire, get your caulking gun back out and secure the bus wire to your frame.
Do this by putting a few dots of silicon down on the board where your bus wire is resting.
Step 6: Inserting a Positive & Negative Connection
Now it’s time to insert the positive and negative connections into your solar panel.
For this, you need to get out your two different sets of 22-gauge wire, preferably different colors.
This makes it easier to keep track of them.
One wire to serve as your positive connection and another wire to serve as your negative connection.
You need to drill two holes into one corner of your frame for the gauge wire to go through and connect to the bus wire.
I would recommend filling these holes with a rubber substance of sorts that you can glue in with silicon and then later drill in smaller holes.
The rubber makes a more secure pathway that is less likely to be affected by the elements such as rain and snow.
For your negative connection, you must run the wire around the frames inside the perimeter to the opposite corner of the drilled holes are.
Then connect it to the bus wire once again using your soldering iron.
You can keep the negative wire in place around the perimeter of the frame by using a staple gun or a wire cover.
For the positive connection, use your soldering gun to connect it to the bus wire right at the corner where the holes in the frame are.
This creates your circuit of energy with the positive and negative connections being plugged in at exact opposite ends of the board and flowing through it.
Step 7: Cover the Frame in Plexiglas
The last thing you need to do to complete the construction is to cover the front of the frame with a transparent Plexiglas.
You’re thus protecting your cells from the previously mentioned elements like rain, snow, and even creatures.
Cut the Plexiglas to the exact measurements of your frame, including the border.
So make sure you measure carefully.
If you don’t want to cut your Plexiglas yourself, then you can have them cut at your local hardware store.
Once you have your Plexiglas cut and ready, you need to drill it into the frame so that it’s airtight.
I would recommend drilling several screws in all four borders of your frame to ensure its airtightness and security.
That’s it!
Your solar panel is ready to start soaking up some solar energy. If you want a portable backup while your panel is in use, take a look at the best solar generators for off-grid power.
Step 8: You’ve Built Your Solar Panel, What Comes Next?
Once you have the panel built and operating, the next step is to start converting that energy into a battery, which you can use to power the household appliances that you wish.
For this, you need a high-quality battery tailored to the needs of your homemade solar panel.
To find the right one, check out our guide to the best solar storage batteries. It covers the top options on the market and explains how each one works, which is especially helpful if you’re not the most tech-savvy individual.
Other Useful Resources
Perhaps you’re more of a visual learner.
You’re having difficulty putting together your panel based just on the written instructions above.
If that is the case, I then recommend checking out the following series of videos.
Here you will find an 11 video series of the step-by-step process behind building a solar panel just like the one outlined in this article.
If you’re weighing whether a DIY panel is worth it compared to a professional install, our breakdown of rooftop solar systems can help you compare. For a smaller weekend project, you can also learn how to make a solar lamp using many of the same basic tools and techniques.
Another factor that I am sure many of you’re putting into account when it comes to building a solar panel is the price.
While solar technology may help financially in the long run, the actual assembly of the panel can get a bit pricey in the short term.
To save some cash if you’re on a budget, I would recommend checking out the following link for some tips on how to build a solar panel in an economical yet effective manner.
The recommendations provided by that article do not go into the same detail and intricacies that this article does.
However, for the readers who are maintaining a strict financial limit, a cheap panel is better than no panel, so give it a look!
I advise reading this piece from Investopedia, which weighs the pros vs. cons of moving to the more renewable source for your household energy needs.
Frequently Asked Questions
How much does it cost to build a solar panel from scratch?
The total cost depends on where you source your materials. Solar cells are the biggest expense, typically running between $50 and $150 for a set of 60.
Add in plywood, tabbing wire, bus wire, solder, silicone, and a soldering iron, and most builders spend $200 to $400 total.
How long does a homemade solar panel last?
A well-built DIY solar panel can last 10 to 20 years, though it depends heavily on the quality of your cells and how well the Plexiglas seal holds up. Commercial panels last 25 years or more because of higher-grade encapsulation.
Regular inspection of the frame and wiring helps extend the lifespan of a homemade unit.
Can I connect a homemade solar panel to my home electrical system?
Connecting directly to your home’s electrical grid requires a proper inverter and, in most areas, a permit and inspection. For DIY panels, it is more common to charge a standalone battery that powers smaller devices.
If you want to tie into your home system, consult a licensed electrician to ensure everything meets local code.
How much electricity can a 60-cell homemade solar panel produce?
A 60-cell panel built with standard 6x6-inch polycrystalline cells typically produces between 100 and 200 watts under direct sunlight. Actual output varies based on cell quality, wiring efficiency, and how much sunlight your location receives.
That is generally enough to charge batteries or run small appliances.
Final Thoughts
Now you know how to construct a solar panel and where to get all the raw materials. Beyond the environmental benefits, building your own panel is a rewarding project that can save you money over time.
If you follow through with this build or not, thank you for taking an interest in renewable energy. With passing time and increased innovation, it won’t be long until building home panels is much easier than it is today.
Won’t it be fun to brag about building a panel the old-fashioned way years from now? Happy building!