Most solar lamp tutorials overcomplicate things. This guide keeps it simple with a full parts list, step-by-step wiring instructions, and testing tips so you can build a working lamp in one afternoon.
How to Build a Solar Lamp: A Complete Guide
Solar lanterns and lamps are a great way to decorate your garden or house for different occasions or as permanent lighting.
There are many different affordable lights available in stores, but you can also build a solar lamp that will last for years to come and for less than 25 dollars.
Here are some tips on how to make a DIY solar light, a complete solar lighting package.
How to Build a Solar Lamp?
Building your own solar lamp is an affordable way to start using solar energy without a large panel investment. No electrical expertise is required as long as you follow the instructions carefully.
What Materials Are Needed to Build a Solar Lamp?
Here is a list of the essential tools and parts for a DIY solar light.
- PCB circuit board with a switch and possibly a dusk/dawn regulator
- LED lights
- Battery holder
- AA or AAA NiMH batteries
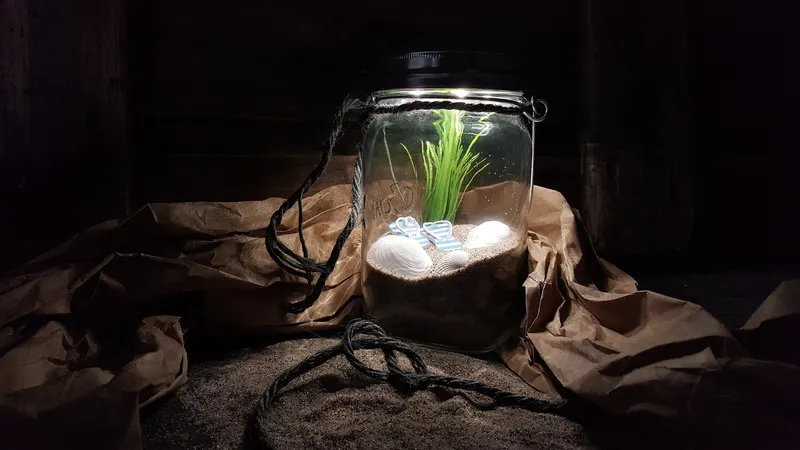
- Jar
- A sharp tool to pierce the jar with or a drill
- Wire nut or soldering machine
- Wire snipper and cutter
- Solar Panel of around 2V voltage
- Superglue or a hot glue gun
If you feel you’re a bit more capable with tools, there is always the option of using the wire nut to solder the wires and even solder the switch, but we will talk about this later.
NOTE: Be sure when you’re buying the parts that the solar panel and the circuit panel are similar in size and not too big for the jar top since we need to glue them to the opposite sides of the jar.
LED LIGHTS come in many types and colors, but if we pick strength as our main criterion, 0.5W stray hat white LED will produce a strong and bright light that should be sufficient for your basic lighting.
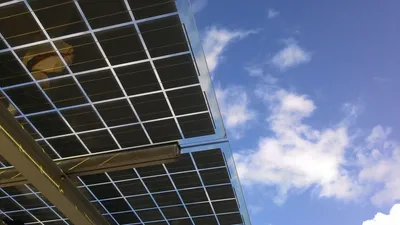
A SOLAR PANEL is needed to convert the energy of the sunlight to electric energy.
A small solar panel of 2V, 40mA, or another panel of similar voltage is perfect for charging our AA NiMh batteries, and you can easily find it on Amazon.
For the BATTERIES and the BATTERY HOLDER, there are a few things to think about, but the size is not one of them. Both AA and AAA batteries will work.
They just need to be rechargeable.
If you’re choosing between nickel-metal hydride batteries (NiMH) and nickel-cadmium (NiCd) batteries, we recommend NiMh batteries, which have a greater capacity.
They also last longer even in cloudy weather, and not to mention that they are better for the environment.
Just remember that the batteries need to be regularly replaced and not overcharged.
One of the ways to do this is to get a circuit board that has a photoswitch called the dusk/dawn regulator that will stop the charge during the night.
If you can not find a CIRCUIT BOARD with all the necessary elements already built into it, we recommend searching on JLCPCB, where you can design your PCB circuit board and get it delivered.
As we already mentioned, the PCB circuit board should not be bigger than the lid since it will be placed directly under it, and if it’s too big, you will not be able to close it.
The jar is, of course, completely up to you, depending on which size or shape you want, but we think nothing beats a good old pickle jar.
You will need to make a hole in the middle of the lid, and it would be a good idea to find something in your toolbox that’s sharp enough to puncture it without too much hassle. A drill would be a good choice, but if you’re not comfortable using it we recommend you ask for some help.
1. CUT & TRIM THE WIRES
You will notice that your battery holder, circuit board, and solar panel all have black and red wires sticking out of them. You will have to trim them all down because they are too long for our lantern.
The red wires are positive, and the black wires are the ground connection, but let’s call them negative.
If you’re using a different circuit board with no wires, you will have to keep in mind to connect the positive wires to the negative parts of the circuit board and the negative wires to the positive parts on the correctly marked spots.
Now it’s time to grab those wire cutters and cut the wires to about 3.5 inches.
Using the same wire cutters, strip the insulation of the wire somewhere between 1.5 to 2.5 inches until you have enough of the bare wire to tie the wires later together.
Choose the right spot to start the stripping, grip the cutter and pull while firmly holding the wire (be careful not to hold the panel, circuit board, or the battery holder because you may pull the wires out),
On the circuit board, you will notice the labels BATTERY and SOLAR printed on it.
Be sure to connect the wires from the battery holder to the wires marked battery, and the same goes for the solar wires.
2. CONNECT THE BATTERY HOLDER TO THE CIRCUIT BOARD
Now it’s time to connect the red wire to the red wire and the black wire to the black wire.
If you know your way around tools, now would be the time to solder the red wire to the red and the black wire to the black, but if you’re not, there is no need to worry because the wire nut is here.
Take the red wire from the battery holder and put the stripped part inside the nut, then take the red wire from the circuit board where it’s marked BATTERY and also put the stripped part inside the nut.
Putting both of the exposed wires in the nut may not be as easy as it sounds. The process requires the same focus as if you were putting a thread through a needle, so, be sure to straighten them before pushing them in.
Once you have put the red wires inside the nut, turn the nut clockwise until the wires are nice and tight.
Remove the nut carefully, and you will see an electrical bond you made without any soldering.
Put the black exposed wire from the battery holder in the nut and the black exposed wire from the circuit next to the mark BATTERY and twist clockwise until the wires form a stable electrical bond.
3. CONNECT THE LED LIGHT
If your circuit board does not have an LED light already built into it, you can attach it yourself.
On the circuit board, you will see an input for the LED lamp that also has a positive where you should put the longer leg of the LED and the negative where you should put the shorter leg of the LED.
4. PIERCE THE LID
Leave the circuit to the side and take the lid off the jar.
Pick up the sharp tool you decided to use to puncture the hole through the lid and be careful not to put the lid on a surface that you’re not afraid to damage, and be careful not to put your hand too close because there is a high risk of hurting yourself.
The hole needs to be wide enough to pull the red and the black wire through, and also, it should be in the center of the lid for the panel to be stable.
5. CONNECT THE SOLAR PANEL TO THE CIRCUIT BOARD
Once you have passed the red and black wire through the lid, it’s time to repeat the same actions when we were connecting the battery wires.
Take the stripped red wire from the solar panel and carefully put it in the wire nut, then take the red stripped wire from the circuit board next to where it’s written SOLAR and put them alongside the wires from the panel in the wire nut.
Twist the nut carefully clockwise until the wires are connected in an electrical bond.
Now do the same with the black wires.
6. GLUE THE ELEMENTS TOGETHER
Like what we mentioned before, it’s important to measure all the elements, including the lid, before you start to build.
The lid should be big enough to be glued to both the circuit board and the battery holder, one next to the other.
Be careful not to glue the batteries to the lid because you will not be able to replace them afterward, and also keep in mind not to glue the edges of the lid because you will not be able to close the jar.
The circuit board ideally should be directly under the panel and the battery holder next to it.
You can use a hot glue gun or a regular tube of superglue, and be sure the elements stick firmly without using too much glue.
Apply the glue to the solar panel on the side with the wires sticking out, and gently press it together.
Screw the lid on the jar, and you have yourself a solar-powered lamp.
Congratulations!
How To Use a Soldering Iron?
With a soldering iron, we have more possibilities and flexibility to connect the elements differently.
Keep in mind you will need to be comfortable with the soldering iron.
SOLAR PANEL
If your solar panel does not have wires already, you can connect them yourself by soldering them with a soldering iron.
On the solar panel, you will notice that there is a positive and a negative terminal.
You should solder the red wire to the positive terminal on the solar panel and the black wire or the negative terminal.
SWITCH
If your circuit board does not have a switch, you can buy one online and connect it with the soldering machine.
Cut the red wire from the battery holder in two and strip it again, so we have 1.5 inches of exposed wire on both sides.
Then solder both of the exposed wires to the outer terminal of the switch.
CIRCUIT BOARD
If your circuit board does not have wires, you should connect the red wires to the positive and black wires to the negative input with a soldering machine.
Solar Lantern or Solar Lamp?
This does not need to be just for your gardens and outside spaces. If you want ready-made outdoor options too, check out the best solar garden lights for your yard.
Besides lanterns, you can make nice indoor lamps that you will, of course, have to keep next to the windows.
You, of course, can always buy a nice solar lamp but making it yourself is much more fun.
If you do make a nice lamp for your veranda, kitchen, or living room you can use your creativity to make lamps of different shapes and sizes-starting with the color of the LED light.
If lighting is not the main purpose of the lamp, but rather a decoration, the LED light does not need to be as strong.
You can find LED lamps in different colors.
There is also an old-fashioned way of going about it: painting the jar.
You can either paint the jar or buy a graffiti spray and color the jars to your liking.
Why not decorate it with markers or watercolors, paper maché, or collage. The ideas are endless.
Maintenance of Solar Lamps
Now we need to maintain our solar-powered DIY lamps and lanterns.
An important part of maintenance is the batteries.
It would be advisable to change the batteries every three months for them to last as long as 2 years. If you want a larger rechargeable setup for multiple devices, look into solar storage batteries.
Another important thing to keep in mind is cleaning.
If there is dust or dirt on the panel, it will be harder for it to absorb the light from the sun and convert it to electric energy.
Keep the lamp or the lantern on the spot where there is enough sun for it to work well.
During the winter months, do not leave the homemade lamp in damp areas because the electrical components may get damaged.
What’s the Use of Solar Lamps?
But these kinds of lamps are not only for decorative purposes.
In countries like India or the Philippines, power outages are a daily occurrence due to inadequate or lack of power supply.
Some families still rely on kerosene for light, and in the long run that can also be expensive.
Solar homemade lamps are a perfect solution for these kinds of communities. For off-grid power needs beyond lighting, portable solar generators are another practical option.
Several associations are trying to introduce the people living in these areas to homemade solar lamps and bulbs, and teach them how to come up with their own.
In some of these countries, because of plastic pollution, there are more than enough plastic bottles lying around that can be used to create plastic bulbs.
These bulbs can be installed in the roofs of the families and create enough light in the living space to charge smaller solar lamps. The bulb serves as an indoor sun.
This is revolutionary for these areas, but still relatively expensive since it’s at least 20 dollars per light bulb.
One of the organizations that are building solar light bulbs from plastic bottles is called Litre of Light.
More Tips on Making Solar Lamps
When you’re making the lamp, especially if you’re using a drill or a soldering machine try to do it in the part of the house that can get messy, like the garage or an outside area.
You should install the battery towards the end of the project to avoid electric shock.
Children under the age of 13 shouldn’t be working with tools like wire cutters or the soldering machine alone. Be sure there is some adult supervision.
Test Your Solar Lamp
Do not forget to test the lights.
If the lights are not working, wires might not be connected properly.
It would be best to test the light before we glue components together. This will make it easier to fix the problem in the later run.
Test it by turning on the switch on the circuit board or the switch you soldered yourself.
If the light is not working it’s probably due to the wire connections and you will have to connect them again or change the wiring altogether.
The light should be on if the batteries are charged, and if they are new batteries, this, of course, should not be a problem.
Also, check if you connected the battery holder to the terminals next to the BATTERY sign and the solar panel next to where it’s written SOLAR.
The same goes if you decided to use a soldering iron.
Check if you connected the red wires to the positive terminal and the black wires to the negative terminal on the circuit board and the solar panel.
Frequently Asked Questions
How long does a DIY solar lamp last?
A well-built solar lamp can last for several years with proper care. The LED lights themselves will typically work for thousands of hours before dimming.
The rechargeable batteries are the component that wears out fastest, usually needing replacement every 6 to 12 months depending on use. Keeping the solar panel clean and the lamp stored properly during bad weather will extend its overall lifespan.
Can I use any jar for a solar lamp?
Most glass jars will work, including mason jars, pickle jars, and canning jars. The main requirement is that the lid is wide enough to fit both the solar panel and the circuit board on opposite sides.
Clear glass lets the most light through, but frosted or tinted jars create a softer, more decorative glow.
How bright is a homemade solar lamp?
Brightness depends on the LED you choose and how well the battery holds a charge. A 0.5W straw hat LED produces enough light to illuminate a small area like a patio table or garden path.
For stronger output, you can wire multiple LEDs in parallel, though this will drain the battery faster.
Does a DIY solar lamp work in cloudy weather?
Yes, a DIY solar lamp works in cloudy weather but with reduced performance. NiMH batteries still charge on overcast days, just more slowly than in direct sunlight.
A full day of cloudy weather may only give you a few hours of light instead of the usual six to eight hours. Positioning the lamp where it gets the most available daylight helps maximize charging even on gray days.
Final Thoughts
Buying a solar lamp is easier, but building your own is more rewarding and costs a fraction of the price. It also makes a great weekend project with a family member or friend.
With basic materials and a little patience, you can create a lamp that runs entirely on sunlight. Give it a try and see what you come up with.